Using VirtualBox

There are numerous ways to set up a home lab. For my purposes, I chose to use VirtualBox as it is free, and pretty simple to do.
There are some drawbacks to this approach though. The first, is that your experience may vary depending on how powerful your host machine is. The second, is that on Windows it doesn’t play very well with Hyper-V.
With that out of the way, let’s get started.
First we need to download our essentials, VirtualBox and your ethical hacking OS. For VirtualBox, I use ParrotOS as it is more lightweight than Kali, and so runs better in VirtualBox, at least for me.
VirtualBox: https://www.oracle.com/virtualization/technologies/vm/downloads/virtualbox-downloads.html
ParrotOS: https://www.parrotsec.org/download/
For Parrot you will want the Security Edition.
I am running this on Windows so the following instructions will be Windows specific, however similar can be done on your choice of OS.
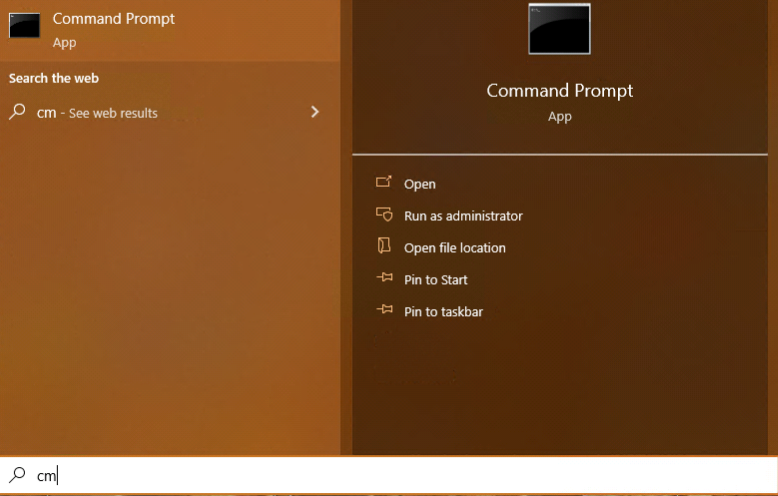
Install VirtualBox as you would any program, but don’t open it just yet. First, we want to set up a virtual internal network. The reason for this is we’ll be downloading and running a number of ‘strange’ VMs. It’s probably not the best idea for them to be able to access your home network, nor to have internet access. To do this, search for command prompt, and choose run as administrator.

Now, type in the below command:
vboxmanage dhcpserver add –netname lab –ip 10.10.10.1 –netmask 255.255.255.0 –lowerip 10.10.10.2 –upperip 10.10.10.254 –enable
As an explanation as to what’s going on here I’ll break it down below:
vboxmanage – A command line interface for managing VirtualBox.
dhcpserver add – Here we are telling VirtualBox to add a DHCP server.
netname – Network name for it to be added to. Remember this, it will be important later.
ip – The IP of the DHCP server/Gateway. In this case, 10.10.10.1 is fine.
lowerip – the lowest IP address that the server can hand out.
upperip – the highest IP address that the server can hand out.
enable – enables the DHCP server.
With this out of the way, we can install Parrot. To do so, first we need to create a virtual machine. I won’t go into deep detail here, as there are plenty of online tutorials on how to create a VM in VirtualBox. The most important things are your processor, memory and network settings. You should set the processor and memory settings to match the minimum requirements for Parrot at a minimum.
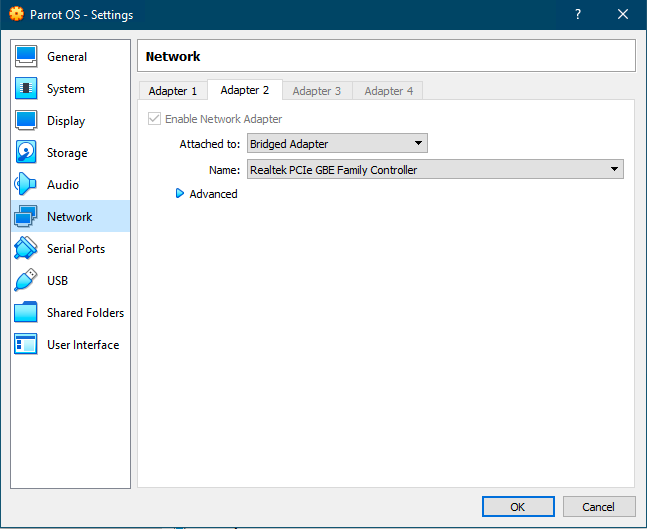
For the network, we’ll be doing something a little different. First, go to the network settings. The first tab will be for your default connected network card. In my screenshot below, I’m showing the second adapter.

What you want to look at here is the Attached to: setting. You’ll want to choose between NAT or Bridged Adapter. NAT will allow your Parrot VM to connect only to the internet, and not your host or any other machine on your network. Bridged will allow these things. This is a bit over simplified, but will be good for a start.
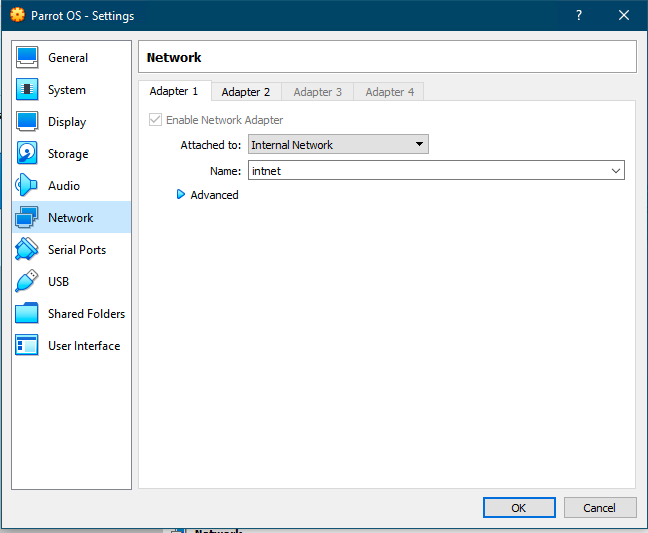
Once done, click on the second tab for an additional adapter and enable it. Here, you want to choose Internal Network and put in the name you chose in the command I listed previously.

This will allow your Parrot VM to connect to your vulnerable VM on an Internal Network that cannot reach the internet or anything else without first going through your Parrot VM.
Once done, boot up Parrot and login. You need to make sure both of your network adapters are enabled and working, which they may not be by default. You can do a quick check in the terminal by typing ip address.
You should see three entries, one for the loopback interface, and two network cards each with different IP addresses. One for the internal network, so something in the 10.10.10 range using the above command, and one for your home IP settings, normally 192.168.0.
Now it’s time to choose a vulnerable VM. You can go to www.vulnhub.com and choose any VM you desire, just make sure that it works well with VirtualBox in the details.
Once downloaded, go to File, then Import Appliance within VirtualBox. Choose the location you downloaded the .ova file to, then click next through the prompts. The vulnerable VM should show now under your ParrotVM in VirtualBox. Be sure to change the network adapter to Internal Network with the same network name before booting it. I also recommend choosing the drop down beside of the start VM button and choose ‘Headless Start’. This starts the VM without a screen attached. You don’t really need a screen anyway for these as you wouldn’t be able to login. The idea is to hack them.
Once you vulnerable machine is booted, you can get its IP by using the command below:
sudo netdiscover -r 10.10.10.0/24
Happy Hacking!